How To Generate An Instagram Authentication Token
Why this can be confusing
Jump straight to the instructions
Since Facebook purchased Instagram in 2012, they (Facebook) have been working to fold the popular photo-sharing app into the broader Facebook ecosystem. Starting in 2020, the Instagram Legacy API has been fully discontinued, and developers who wish to interact with Instagram are now required to use either the Instagram Graph API or the Instagram Basic Display API, both of which are part of the larger Facebook Graph API. In either case, the main thing to know about this switch is that Instagram developer settings are no longer managed at instagram.com. Instead, developers are required to manage Instagram API settings under a Facebook account, at developers.facebook.com.
Now, back to the two Instagram APIs. Why two, and which one do we need to concern ourselves with if all we’re trying to do is add a public Instagram feed to our (our our client’s) website? A quick look at the official docs can help clarify the distinction. The Instagram Graph API “is intended for Instagram Businesses and Creators who need insight into, and full control over, all of their social media interactions.” Whereas the Instagram Basic Display API “can be used to access any type of Instagram account but only provides read-access to basic data.”
For the purposes of adding an Instagram feed to a website, the Instagram Basic Display API is exactly what we need.
What we’ll do
In order to use the API, we’ll first need to create a Facebook App. We’ll then connect this app with our Instagram account. Finally, we’ll use our app to generate an authentication token that we can use when setting up a custom Instagram feed. Let’s dive in.
1. Create a Facebook app
Head on over to developers.facebook.com and log in (if you’re already logged in to Facebook, you may be automatically logged in under that account). Depending on your situation, you may want to create your new app under your own personal Facebook account, or you may be required to create it under another account - for example, if you’re setting up an Instagram feed for a client you may need to use the client’s Facebook account. Luckily, Facebook provides a granular level of control over apps on their platform - so even if you create the app under your own personal account, you can still provide outside access using the Roles feature, as we will see shortly.
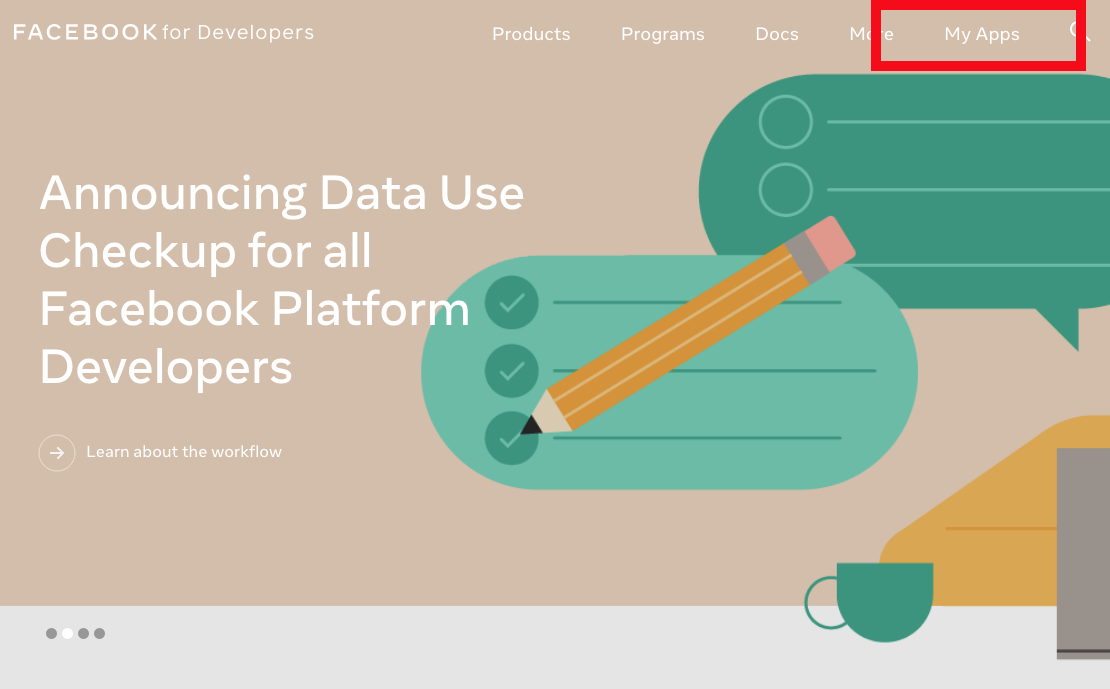
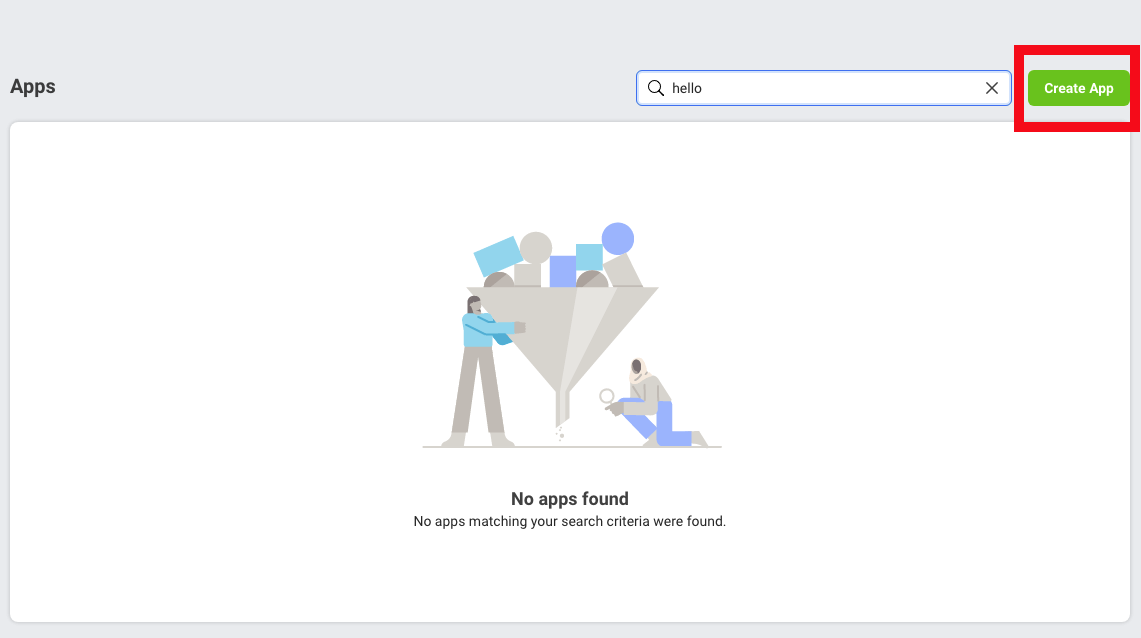
Once logged in to Facebook for Developers, click on My Apps, then Create App.
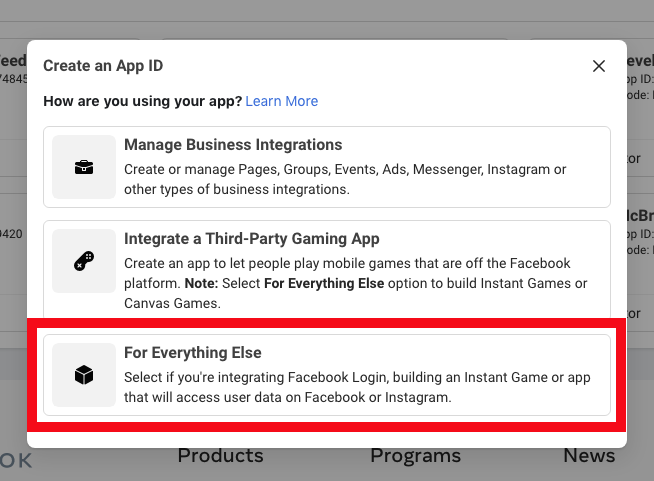
You’ll be presented with the prompt How are you using your app? Select the third option For Everything Else.
In the fields that follow, you can choose whatever you’d like to be the App Display Name, as this won’t be visible on the feed itself. The dropdown field Do you have a Business Manager account? should remain set to No Business Manager Account selected. Click Create App ID and finish the security check.
You’ll now be presented a grid of Products. Select Set Up on the Instagram Basic Display product.
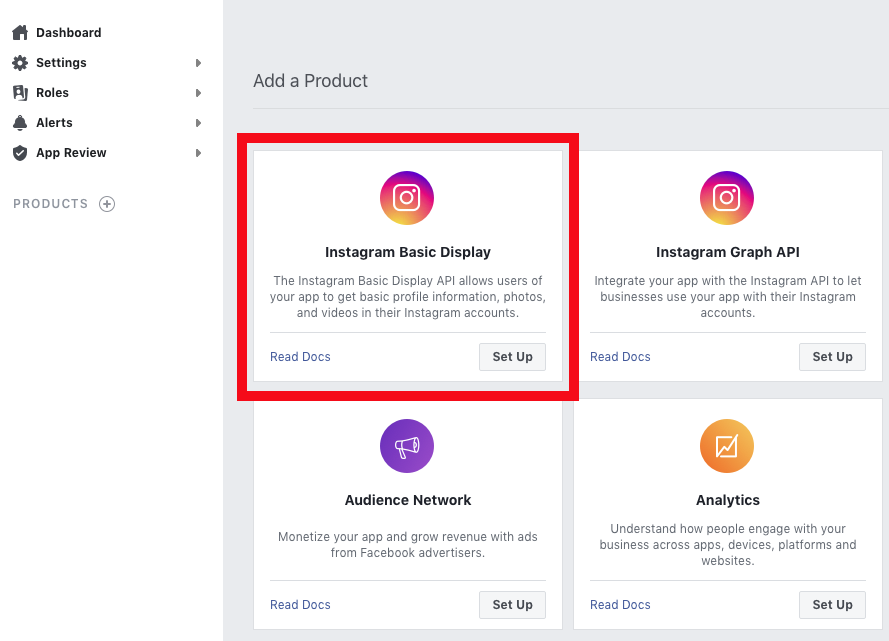
This will add the Instagram Basic Display to the sidebar and present an overview of the product. However, we haven’t actually created our app yet. Read through the details, then at the bottom select Create New App.
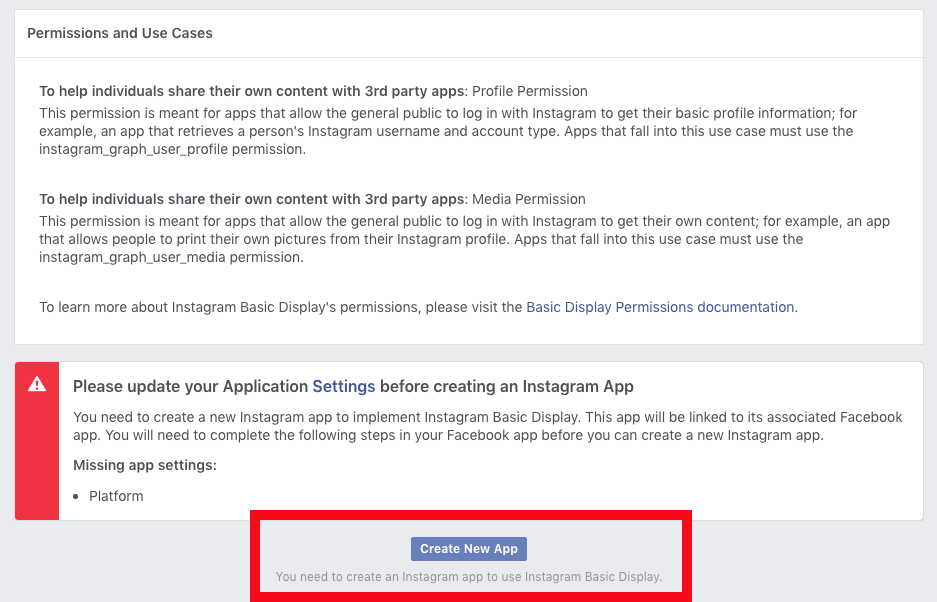
In the pop-up window, give your app a name and select Create App. Note that the form will complain if you try to include words related to the Instagram or Facebook brands.
2. Add an Instagram ‘tester’ account
Now it’s time to designate our Instagram account as a ‘tester’ account for our new app. This will allow us to generate the long-lived access token we’ll need to link our Instagram feed to our website. On the Basic Display page, scroll down to the User Token Generator section and select Add or Remove Instagram Testers.
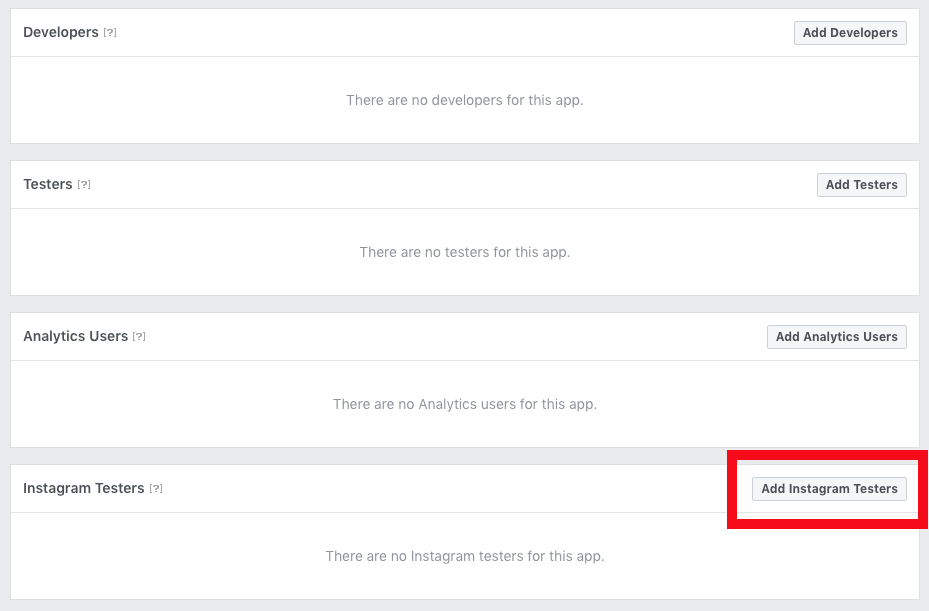
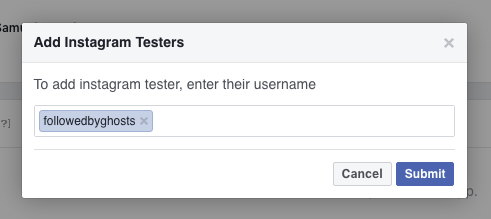
This will open up the Roles page for your app that we mentioned above. Here you have multiple options for adding other people to your app. Perhaps you want your client to be able to access the app - you can add them here under the appropriate role to grant such access without worrying about handing over the credentials to your personal Facebook account. For our needs, we just want an access token. Select Add Instagram Testers and enter the username of the Instagram account you wish to add to your site. Note that only public Instagram accounts are eligible for generating access tokens.
3. Accept the tester account invite on Instagram
Once you add your Instagram tester, an invitation will be sent from your app to the Instagram account.

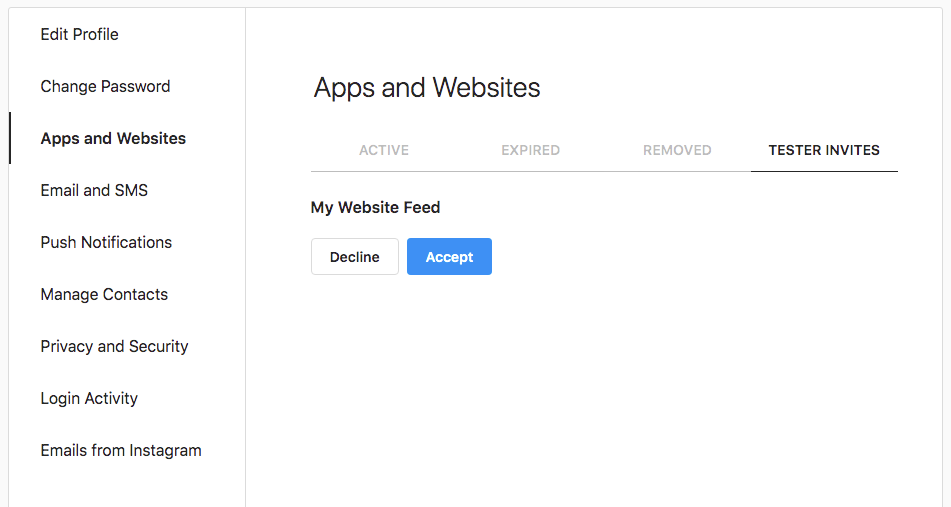
The next step is to accept that invitation. In a new window, navigate to Instagram and sign in to the account in question. Navigate to the Settings menu.

Select Apps and Websites in the left-hand menu, then the Tester Invites tab. Here you will see the name of the Facebook app you created earlier. Accept the invitation. Your Facebook app now has permission to access this Instagram account.
4. Generate a long-lived access token
Now we’re ready to generate the long-lived access token that we need to tie an Instagram feed to our website. Back in our Facebook app, under Products, select Instagram Basic Display and under that, Basic Display. Scroll down to the User Token Generator section and select Generate Token.
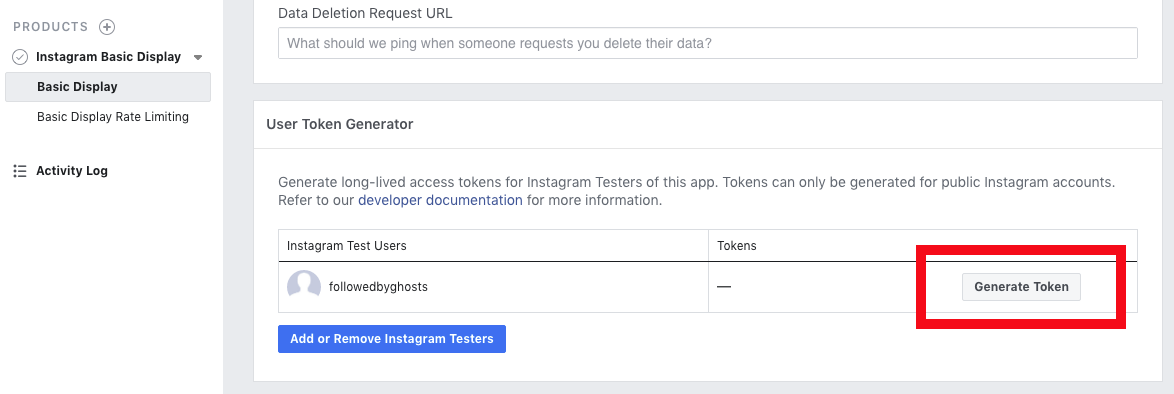
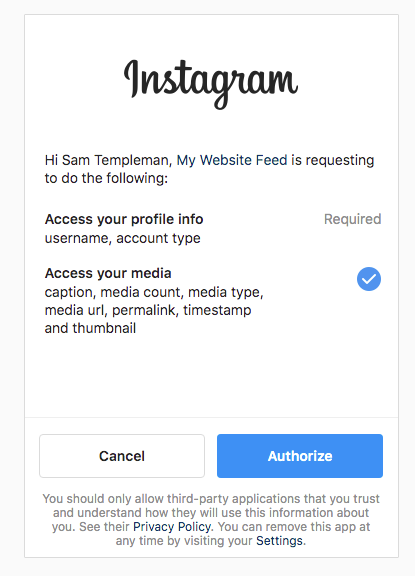
A pop-up window will prompt you to log in to the Instagram account in question. After you do, you’ll be asked to authorize your Facebook app.
Finally, return to the Facebook app page and you’ll be presented with the long-lived user access token.
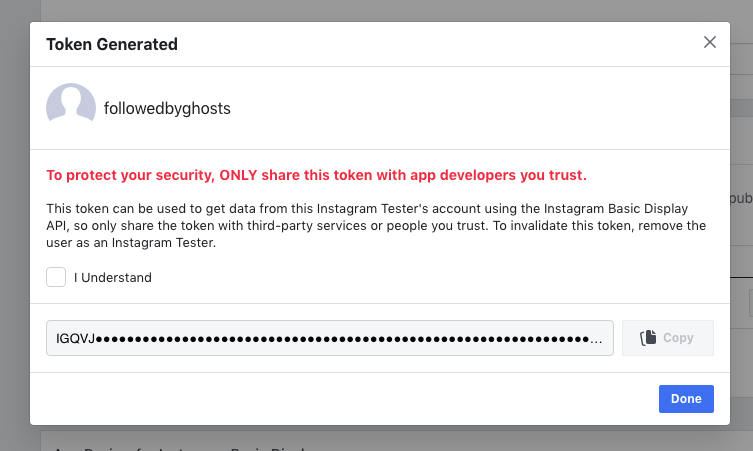
You’ll need this token, along with the user id of your Instagram account, to initialize a custom Instagram feed on your (or your client’s) website. There are lots of tutorials out there on ways to set up a feed of your own, either coding it from scratch or using a third-party service or plugin.


